Introduction
If you love magical mini worlds, soft greenery, and charming handmade details, then building a DIY fairy garden is the perfect creative project for you. Fairy gardens have become incredibly popular on Pinterest because they combine gardening, crafting, and storytelling all in one tiny space. Whether you have a large backyard, a balcony, or just a small tabletop, you can create your own enchanted world filled with miniature houses, winding pathways, glowing lights, and delicate plants.
The best part? You don’t need professional gardening skills to get started. With a few simple supplies, a little imagination, and step-by-step guidance, you can design a fairy garden that looks straight out of a storybook. These 24 easy steps will help you build a magical garden from start to finish — perfect for beginners, kids, or anyone who wants to add a whimsical touch to their home decor.
🌿 Why a DIY Fairy Garden Is the Best Creative Project
A DIY fairy garden is more than just decoration — it’s an experience. It allows you to slow down, get creative, and connect with nature. Unlike regular gardening, fairy gardens are small, manageable, and budget-friendly. You can reuse old containers, broken pots, pebbles, and craft supplies to design something truly unique.
It’s also perfect for Pinterest content because fairy gardens are highly visual, customizable, and shareable. Each tiny detail — from miniature benches to glowing lanterns — makes your creation look magical in photos. Whether you’re building one for your patio, living room, or as a gift, these easy steps will guide you toward creating a charming miniature world that feels both cozy and enchanting.
🌼 1. Choose the Perfect Container
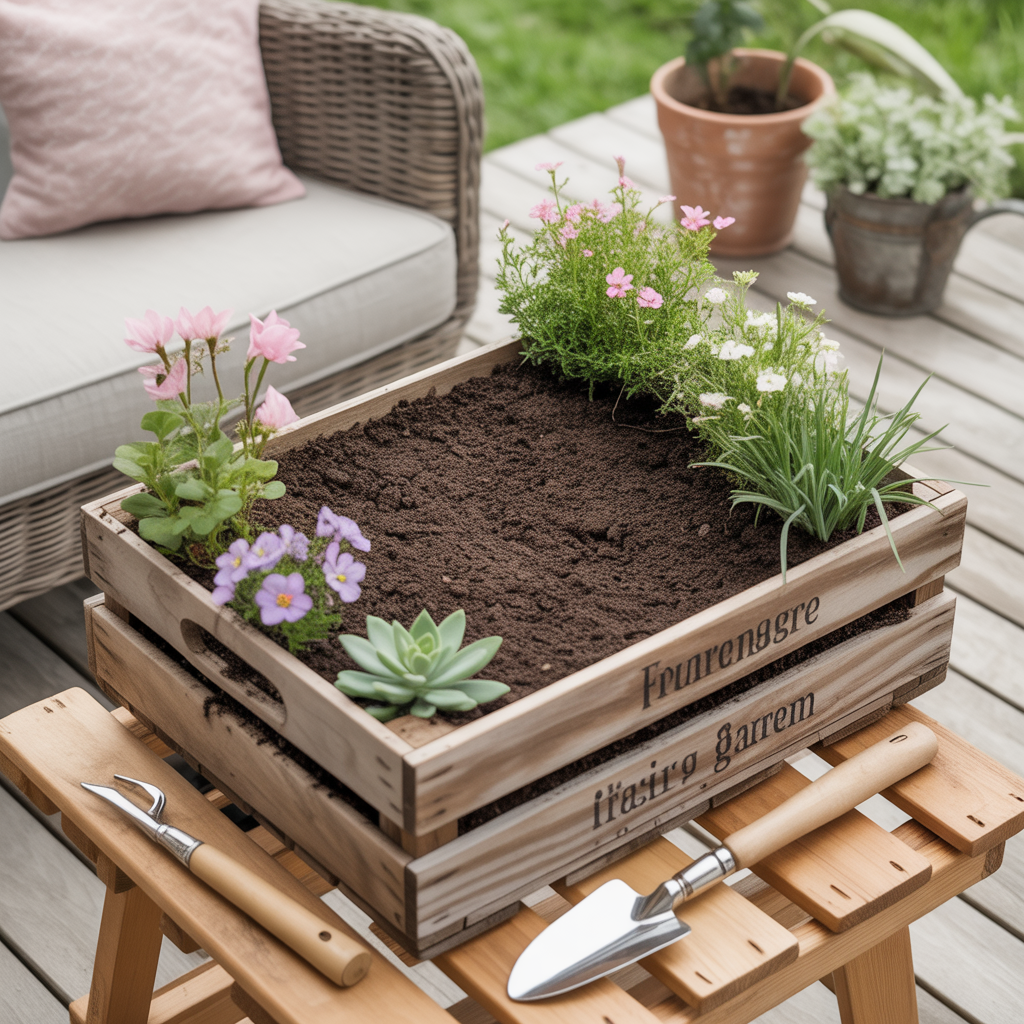
The first step in building a fairy garden is selecting the right container. You can use almost anything — a wooden crate, ceramic pot, old wheelbarrow, teacup, or even a broken planter. The key is choosing something with proper drainage and enough depth for soil and plant roots. If you’re working indoors, make sure the container has a tray underneath to prevent water spills. Think about the overall theme you want: rustic, woodland, beachy, or colorful cottage style.
A large shallow pot works beautifully for creating multiple sections like a pathway, fairy house corner, and tiny seating area. If you want a dramatic Pinterest-worthy look, consider using layered containers or stacked planters to create height variation. Your container sets the tone for the entire garden, so pick something that matches your style and space. Once you’ve chosen the perfect base, you’re ready to transform it into a magical miniature world.
🌱 2. Add Quality Potting Soil
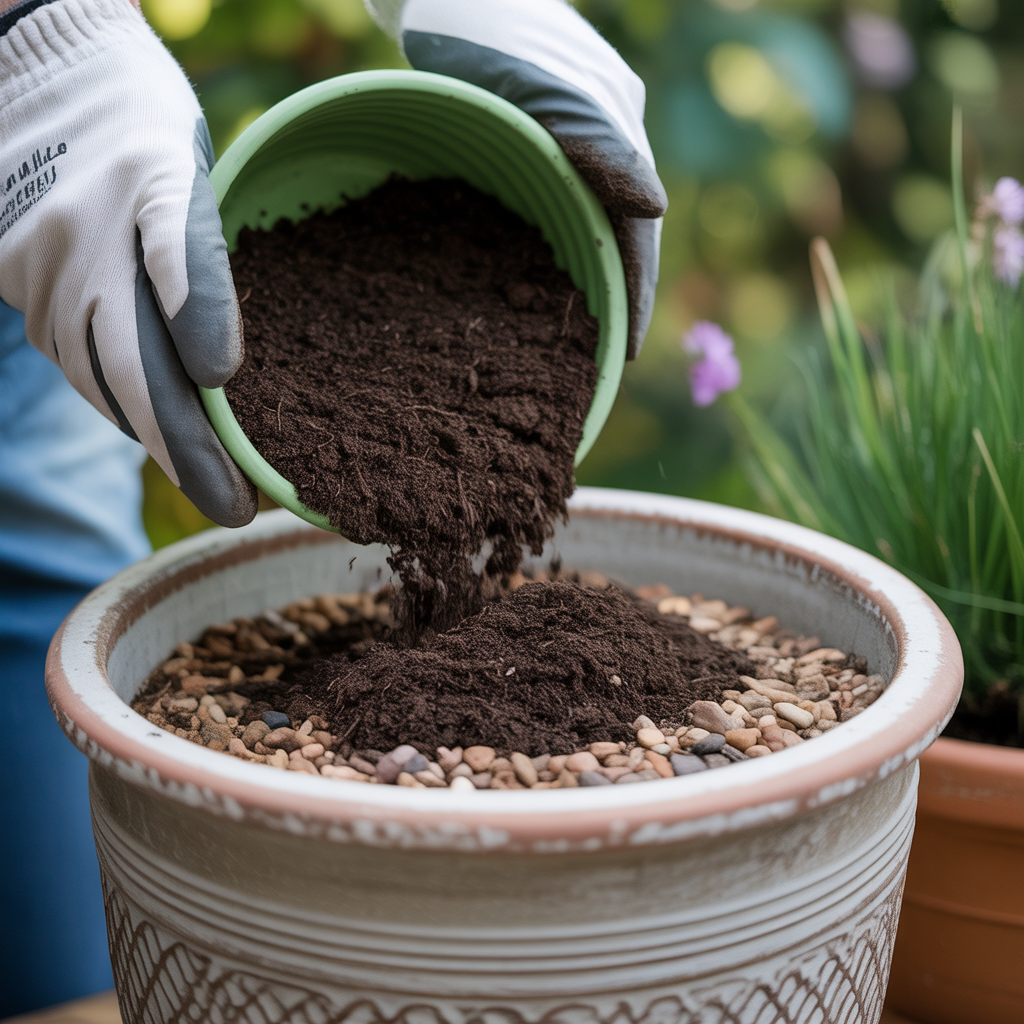
Healthy soil is the foundation of any successful fairy garden. Choose high-quality potting mix that drains well and supports plant growth. Avoid using regular garden soil because it can become compacted in containers and may not drain properly. If your container does not have drainage holes, add a layer of small stones or gravel at the bottom before pouring soil. This helps prevent root rot and keeps plants healthy.
When filling your container, leave a little space at the top for decorative elements like pebbles, moss, and pathways. Lightly press the soil down but avoid packing it too tightly. Your soil should feel soft and airy. Think of this as preparing the “land” for your fairy world. Good soil ensures your plants thrive and your fairy garden stays beautiful for months. Once your base is ready, you can start arranging plants and decorative pieces with confidence.
🌿 3. Select Miniature Plants
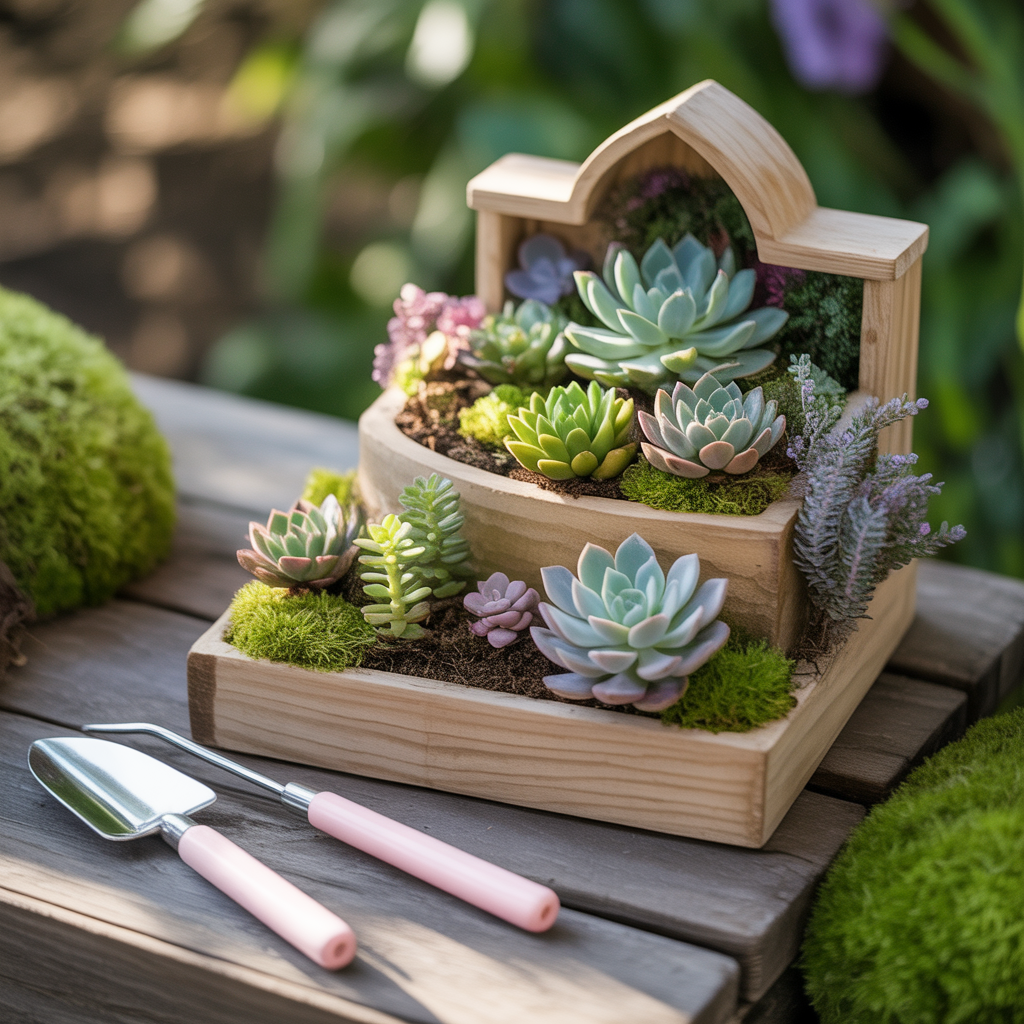
Choosing the right plants makes your fairy garden look realistic and enchanting. Look for small plants like succulents, moss, baby tears, thyme, or dwarf ferns. These plants stay compact and are easy to maintain. If your garden will be indoors, choose low-light plants. For outdoor fairy gardens, select sun-loving varieties that suit your climate.
Arrange taller plants at the back and shorter ones in the front to create depth. Mixing textures — like soft moss with spiky succulents — adds visual interest. Avoid overcrowding the space; leave room for pathways and decorative pieces. The goal is to create a tiny landscape that feels balanced and natural. Mini plants act like trees and bushes in your fairy world, so position them thoughtfully. Once planted, gently water them and allow them to settle before adding accessories.
🌼 4. Create a Mini Layout Plan
Before placing decorations, take a few minutes to plan your fairy garden layout. Think of it like designing a tiny landscape. Decide where the fairy house will sit, where pathways will flow, and where plants will frame the space. Creating a visual balance is important — you don’t want everything crowded in one corner. Start by placing larger elements first, such as houses, trees, or fences, and then build around them with smaller accessories.
Sketching a quick layout on paper can help you visualize the final look. Consider creating sections, like a cozy sitting area, a flower patch, or a magical woodland corner. Adding curves instead of straight lines makes the garden look more natural and whimsical. A well-planned layout gives your fairy garden depth and charm, making it look professionally styled. Once you’re satisfied with the arrangement, gently press larger items into the soil to secure them before adding finer details.
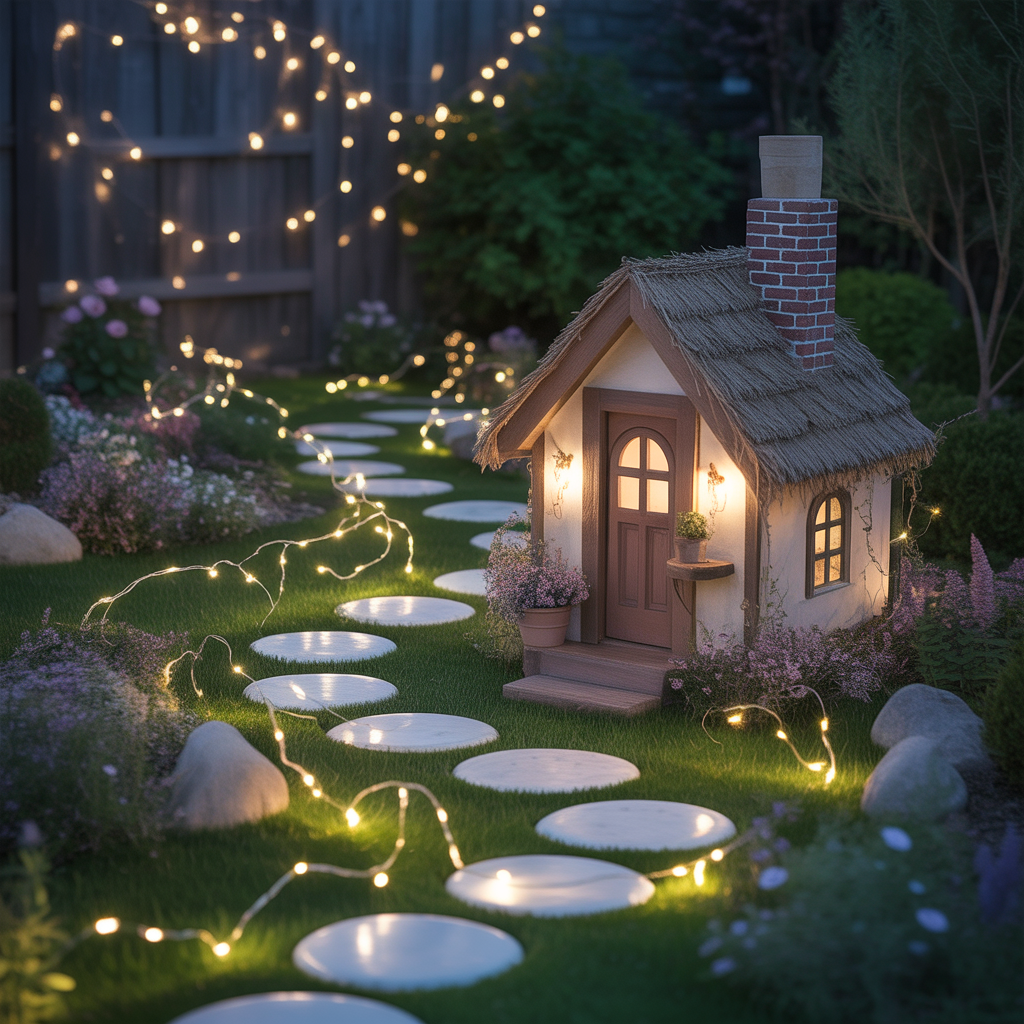
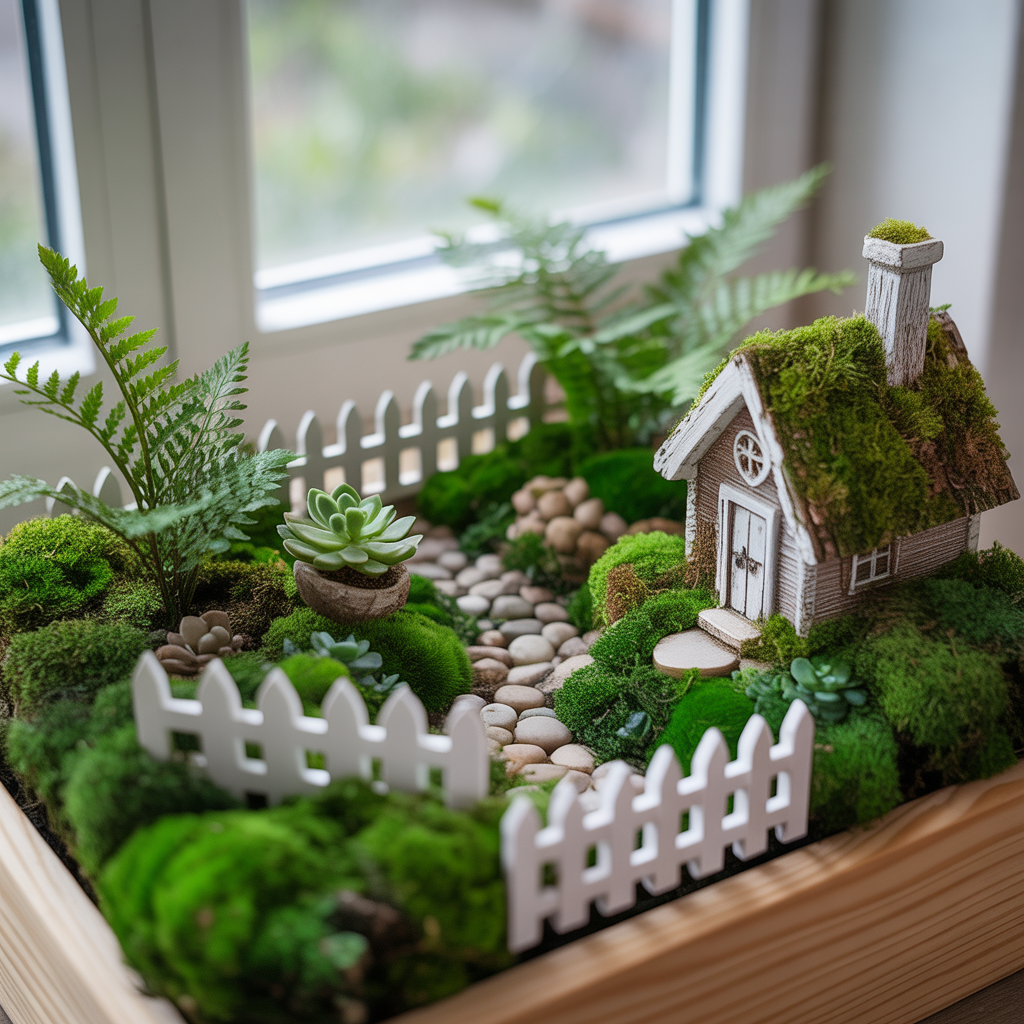
🏡 5. Add a Fairy House
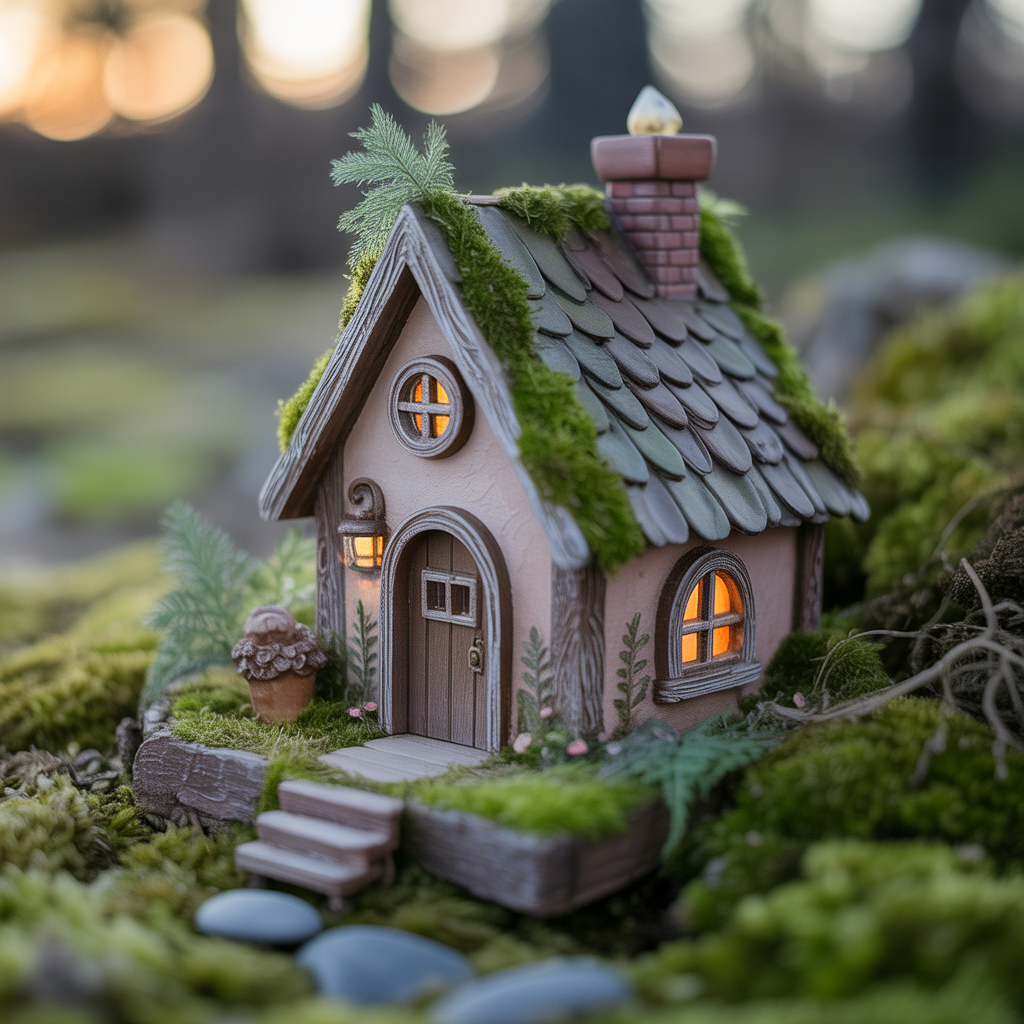
The fairy house is the heart of your garden. It creates a focal point and gives your miniature world a story. You can buy ready-made fairy houses or create one yourself using bark, twigs, clay, or small wooden boxes. Choose a design that matches your theme — rustic woodland, pastel cottage, or even a beach hut. Position the house slightly off-center to create a natural look.
To make it look realistic, nestle the house into moss or partially surround it with plants. Adding small details like tiny windows, painted doors, or miniature flower boxes enhances the charm. If your garden is outdoors, make sure the house is weather-resistant. For indoor gardens, you can be more creative with delicate materials. A beautifully styled fairy house instantly transforms your container into a magical space, making it the most photographed feature of your Pinterest-worthy project.
🪨 6. Build a Pebble Pathway

A winding pebble pathway adds structure and storytelling to your fairy garden. It guides the eye and makes the space feel intentional. Use small pebbles, gravel, crushed shells, or decorative stones to create the path. Start by lightly pressing the path outline into the soil, then carefully place pebbles along the line. Curved pathways look more natural and whimsical than straight ones.
To make it even more magical, line the pathway with tiny flowers, moss, or miniature lanterns. Press the stones firmly so they stay in place when watering. You can also glue pebbles onto a thin cardboard strip if you want a cleaner finish. A well-designed pathway connects different sections of your fairy garden and makes it look like a real tiny village. It’s a simple detail that makes a big visual impact in photos and real life.
🌸 7. Add Mini Furniture
Miniature furniture brings personality and life into your fairy garden. Tiny benches, chairs, tables, swings, or even a small tea set make the space feel lived-in and cozy. You can purchase ready-made pieces or craft your own using popsicle sticks, wire, or clay. Choose furniture that matches your theme — rustic wooden pieces for woodland gardens or white painted chairs for cottage style.
Place furniture near the fairy house or along the pathway to create inviting scenes. Avoid overcrowding the area; a few carefully placed items look more elegant. Adding small details like a tiny book, teacup, or flower pot on the table creates storytelling magic. These small accessories make viewers pause and admire your creativity. Mini furniture turns your garden from simple decoration into a charming miniature world full of imagination and warmth.
🌿 8. Use Moss for a Natural Look
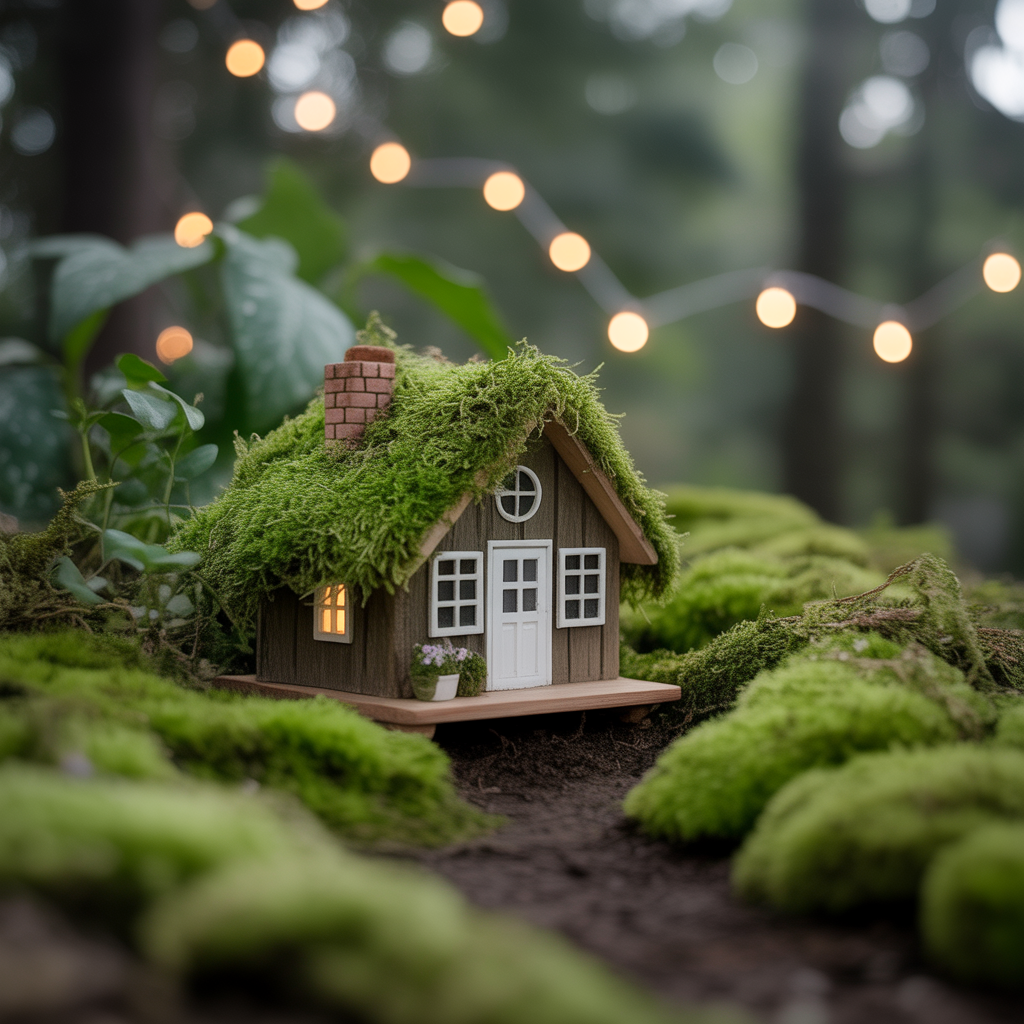
Moss is one of the easiest ways to make your fairy garden look lush and magical. It acts like grass in your miniature landscape and fills empty spaces beautifully. You can use real moss or preserved decorative moss from craft stores. Gently press it into the soil around plants, pathways, and the fairy house to soften harsh edges.
Moss creates a forest-like atmosphere and makes everything blend naturally together. It also helps retain moisture in the soil if you’re using live plants. Use different shades of green moss for depth and dimension. Tuck moss around the base of decorations to hide gaps and make the setup look seamless. This simple addition instantly upgrades the aesthetic, giving your fairy garden a dreamy, enchanted forest vibe that looks stunning in photos.
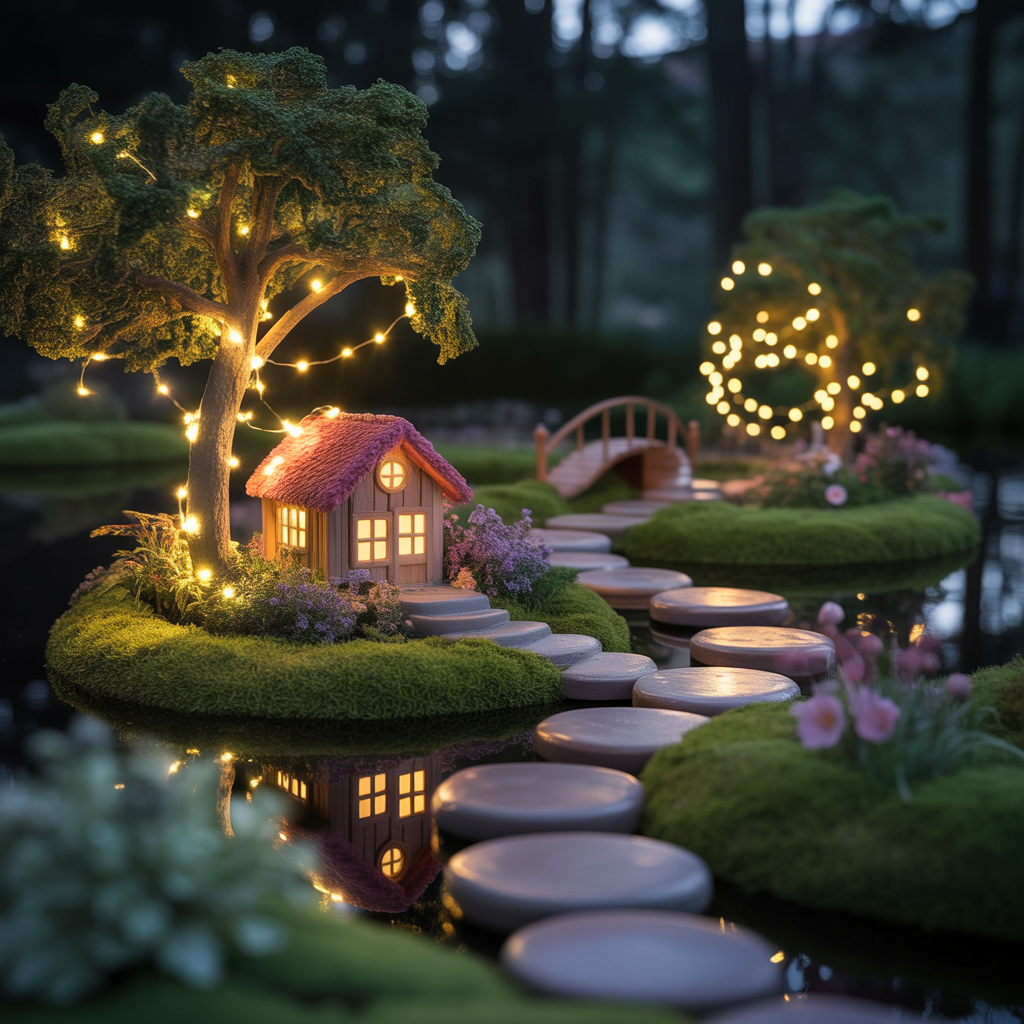
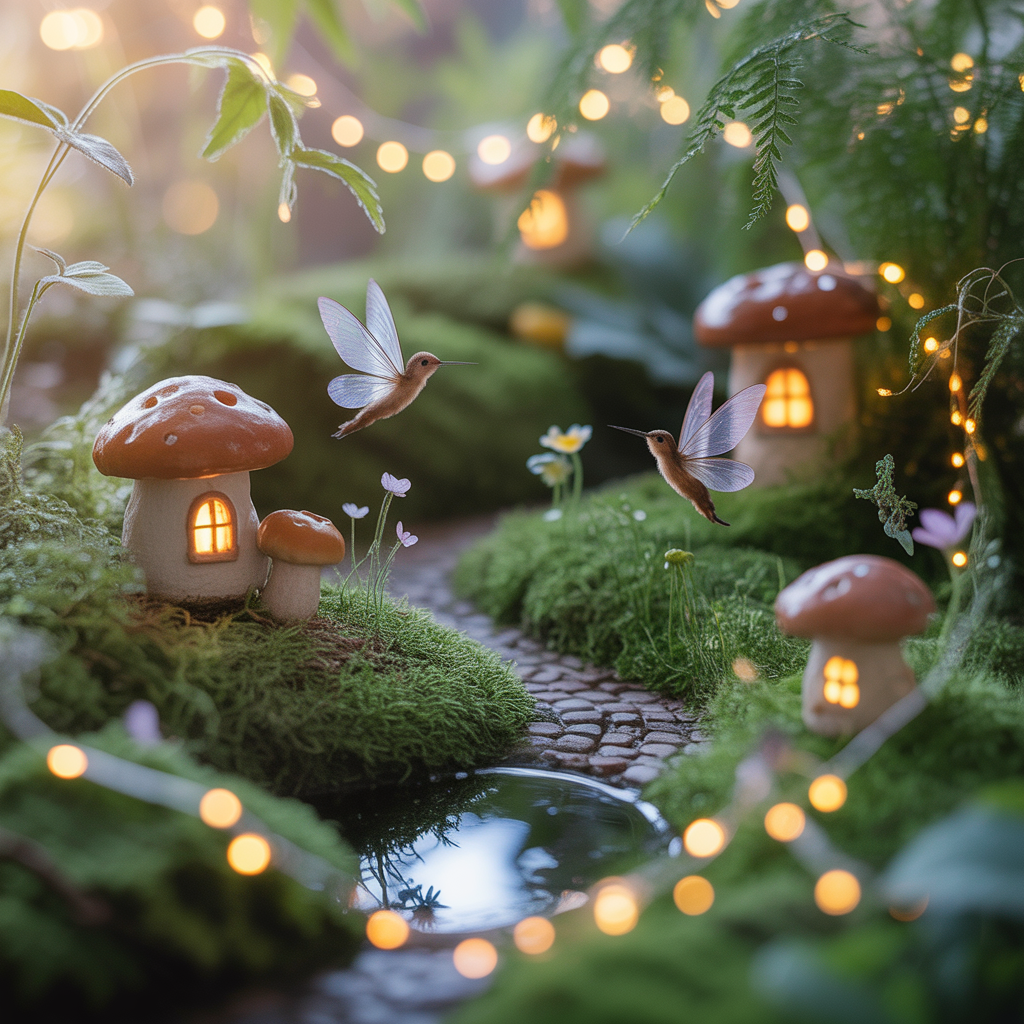
🌟 9. Add Tiny Fairy Lights
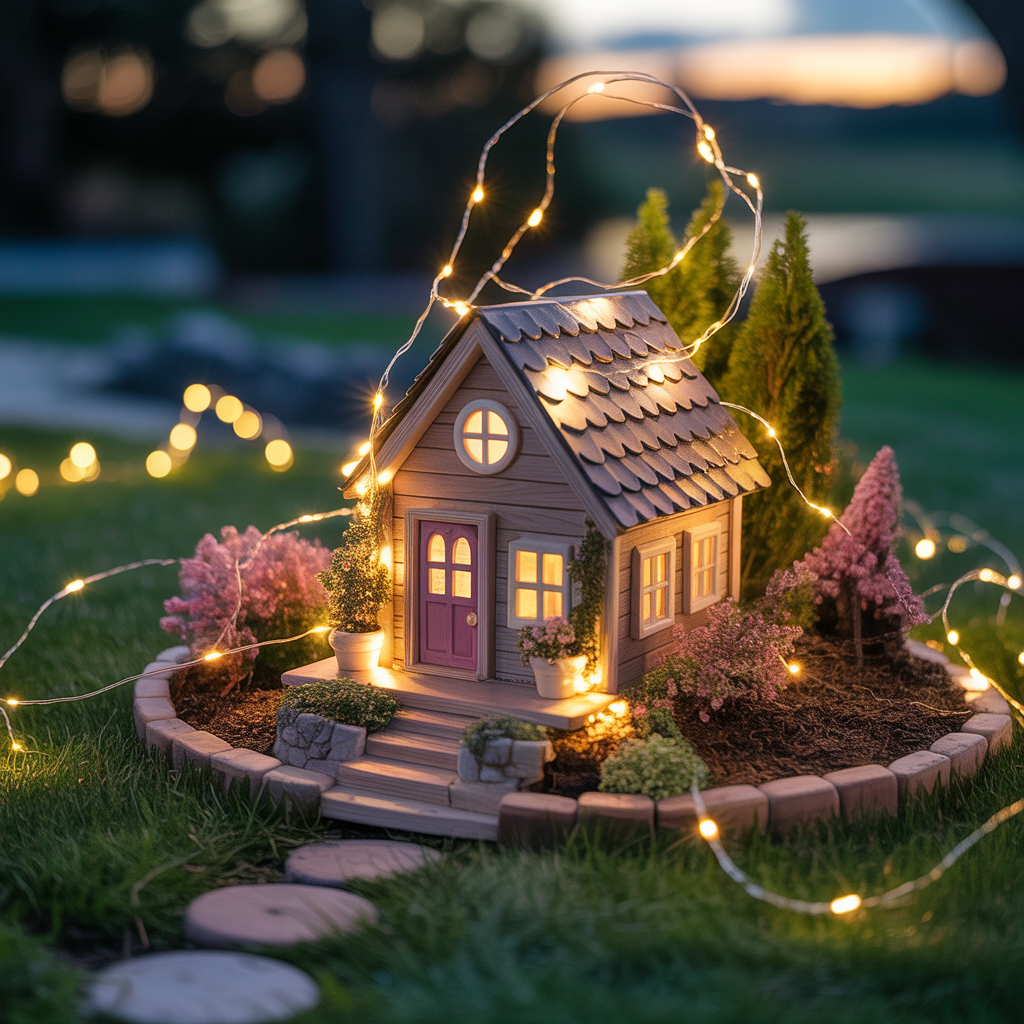
Adding miniature fairy lights instantly transforms your garden from cute to magical. Soft glowing lights create a dreamy atmosphere, especially in the evening. Use battery-operated micro LED string lights, as they are safe, lightweight, and easy to hide within plants and decorations. Carefully weave the lights around the fairy house, tuck them under moss, or wrap them around miniature trees to create a glowing woodland effect. Warm white lights give a cozy cottage vibe, while soft golden tones enhance a mystical fairy-tale look.
Lighting adds depth and dimension, making your fairy garden stand out beautifully in Pinterest photos. Hide the battery pack behind the container or beneath decorative stones to keep the design clean. Make sure wires are subtly blended into the greenery so they don’t distract from the aesthetic. Even during the daytime, tiny lights add a charming decorative element. At night, they create a breathtaking glow that makes your miniature world feel alive and enchanted.
🌼 10. Create a Water Feature
A tiny water feature adds movement and realism to your fairy garden. You can create a small pond using a shallow lid, glass dish, or resin piece painted blue to mimic water. Surround it with pebbles, moss, and miniature plants to make it look natural. If you prefer a simple design, use clear resin to create a glossy water illusion. For outdoor gardens, you can even use a small solar-powered fountain for gentle water sounds.
Position the water feature near the fairy house or along a pathway to create balance. Adding tiny ducks, stepping stones, or a miniature bridge enhances the storytelling element. Keep the scale appropriate so the pond doesn’t overpower the garden. Water elements reflect light beautifully, especially if paired with fairy lights nearby. This feature adds charm, serenity, and a whimsical touch that elevates your fairy garden design into something truly magical and Pinterest-worthy.
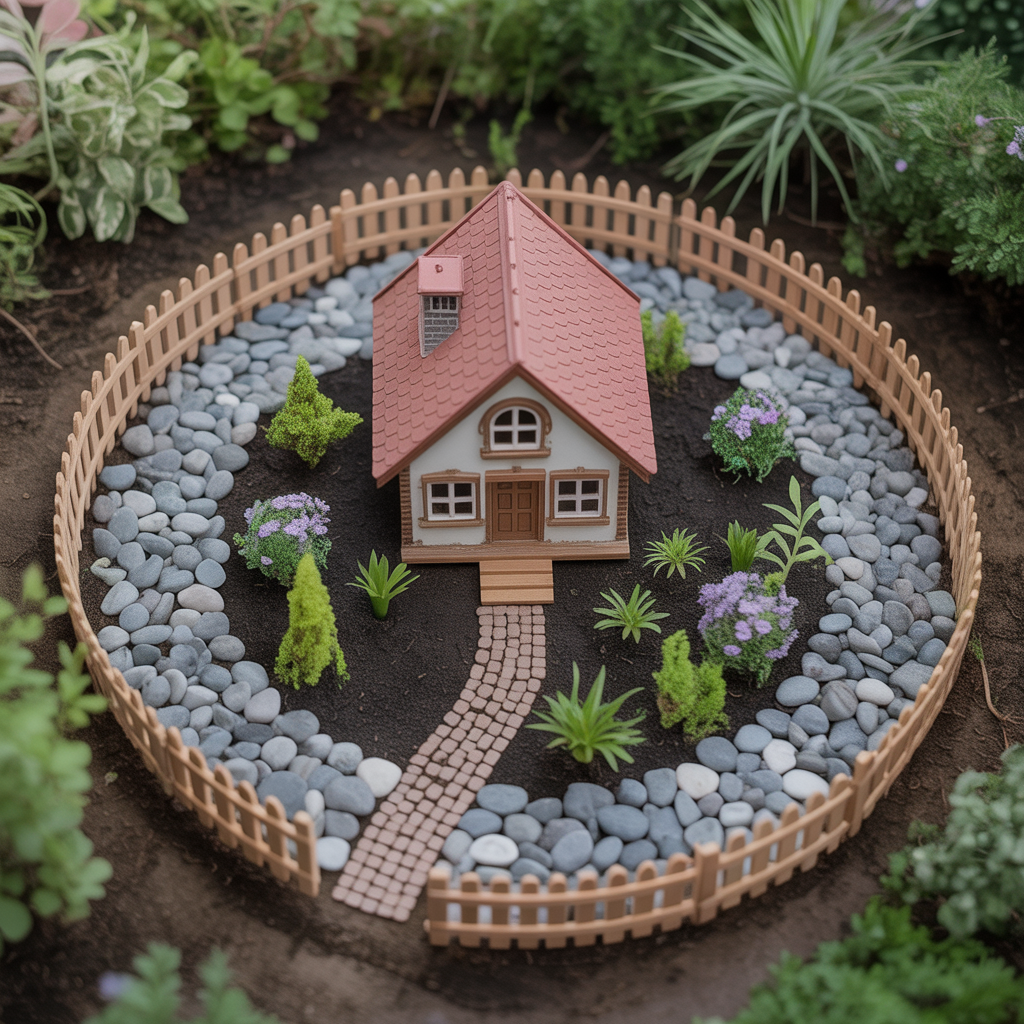
🌷 11. Install Mini Fences
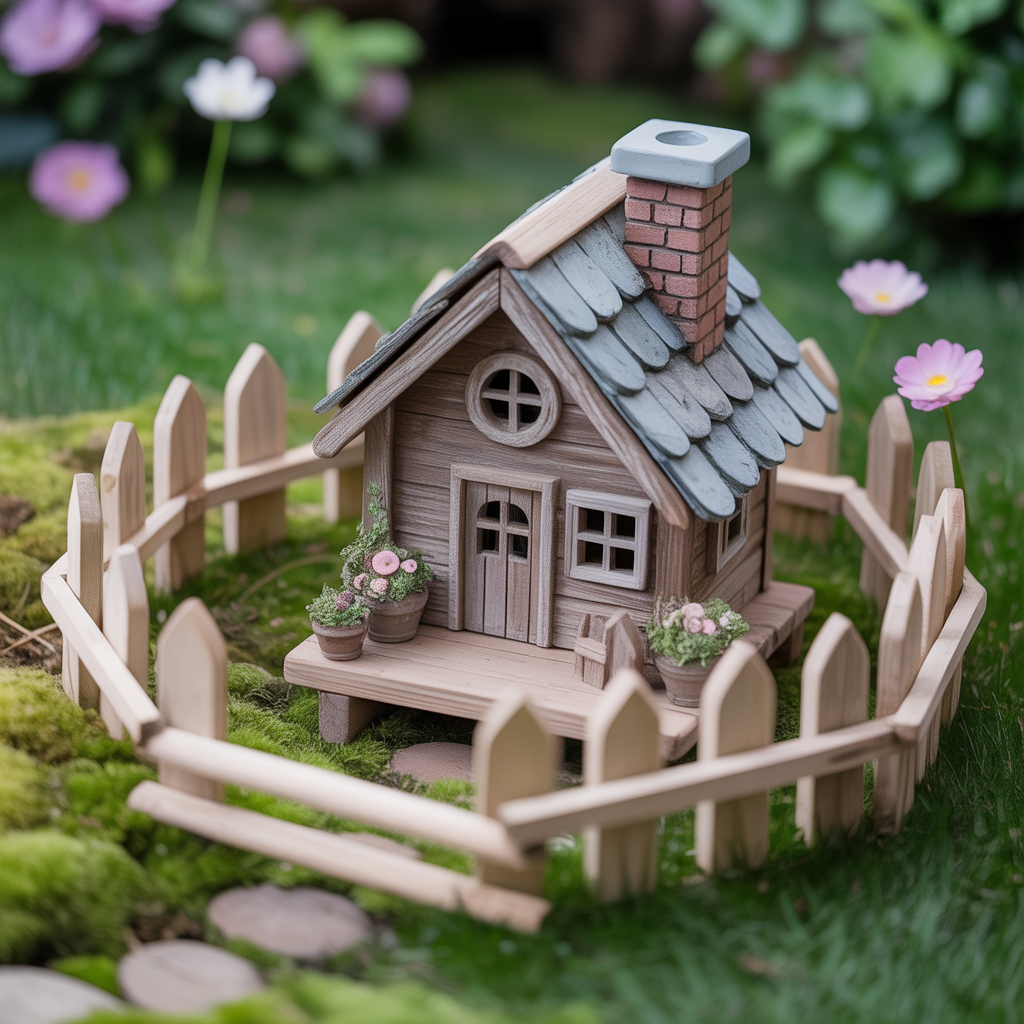
Mini fences help define areas within your fairy garden and make it look structured. Small wooden, wire, or twig fences create boundaries around the fairy house, garden beds, or pathways. You can purchase ready-made miniature fences or craft your own using toothpicks, twigs, or popsicle sticks glued together. Lightly press the fence into the soil so it stands firmly without tilting.
Fences add a storybook cottage feel and make the space look thoughtfully designed. You can leave the wood natural for a rustic woodland theme or paint it white for a charming cottage vibe. Position fences to frame key areas rather than enclosing everything. A partial fence looks more natural than a fully boxed layout. This small detail adds dimension and visual interest while enhancing the magical village aesthetic that makes fairy gardens so captivating on Pinterest.
🐦 12. Add Miniature Animals
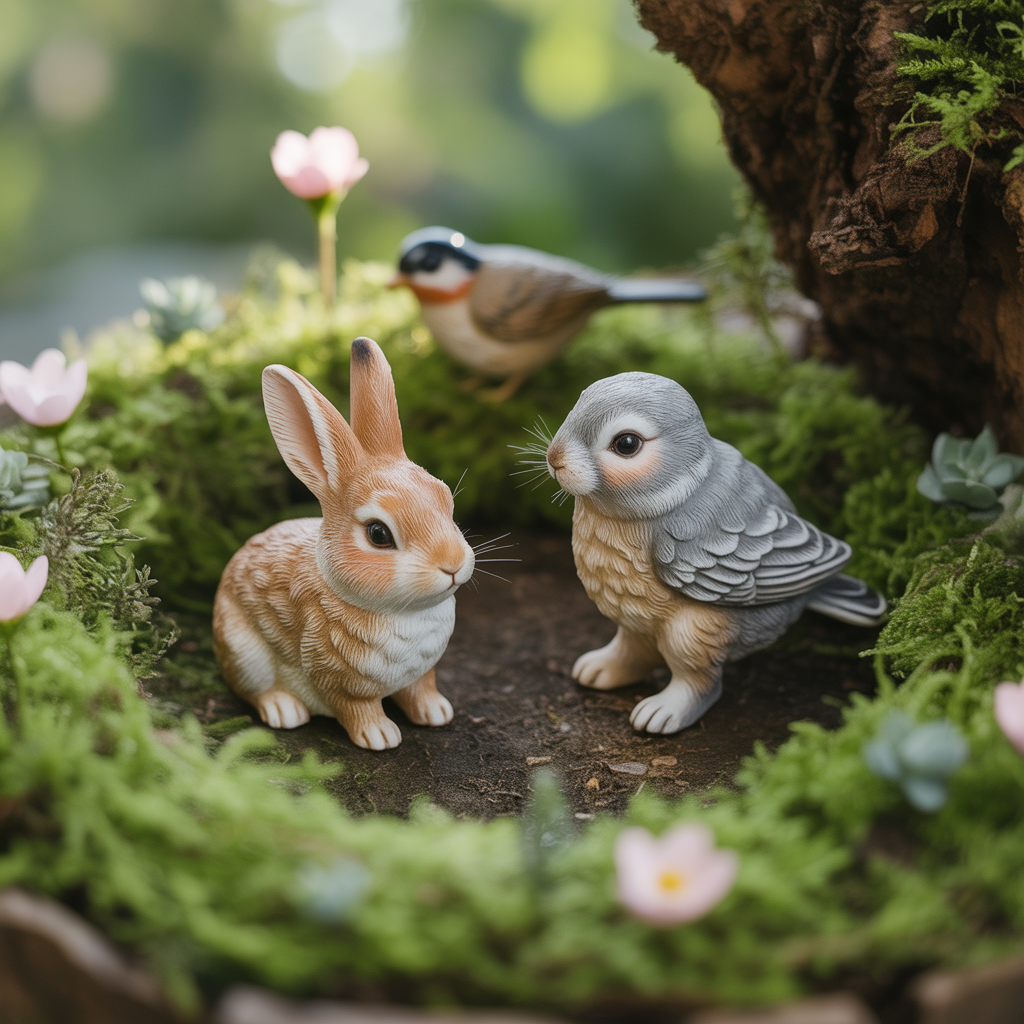
Miniature animals bring life and personality to your fairy garden. Tiny birds, rabbits, deer, hedgehogs, or even butterflies make the space feel animated and playful. Choose figurines that match your theme — woodland animals for a forest vibe or tiny farm animals for a countryside feel. Place them naturally near plants, pathways, or water features to create storytelling moments.
Avoid overcrowding your garden with too many figurines. Instead, strategically place two or three animals to maintain balance. Position them as if they’re interacting with the environment — a rabbit near flowers or a bird beside the fairy house. These subtle details make the scene feel alive and magical. Miniature animals are especially eye-catching in close-up photography and help create emotional connection with viewers. They add warmth and charm, turning your fairy garden into a delightful miniature ecosystem.
🌺 13. Decorate with Mini Flowers

Mini flowers add color, softness, and charm to your fairy garden. You can use small flowering plants like baby roses, alyssum, or tiny artificial blooms for long-lasting beauty. Arrange flowers around the fairy house entrance, along pathways, or near seating areas to create focal points. Mixing soft pastel shades with vibrant pops of color adds visual contrast and depth.
When placing flowers, think about balance and layering. Taller blooms can sit at the back, while smaller flowers frame the front. Avoid overwhelming the space with too many bright colors; choose a harmonious palette that complements your theme. Adding miniature flower pots near the house enhances realism and gives the impression of a well-kept fairy home. Flowers make your garden feel joyful, lively, and picture-perfect — exactly the kind of dreamy aesthetic that performs beautifully on Pinterest.
🌳 14. Add Mini Trees for Height
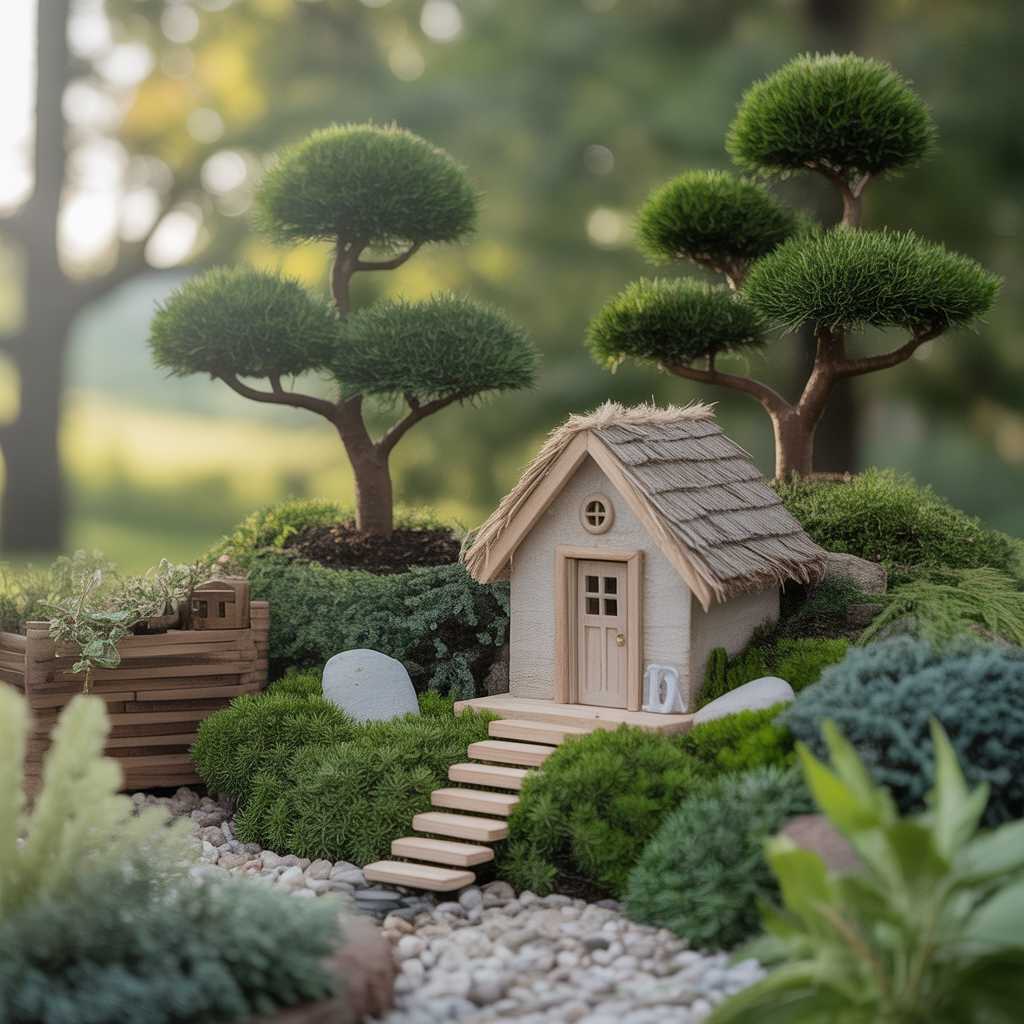
Adding miniature trees creates vertical interest and makes your fairy garden feel like a real landscape. Small bonsai-style plants, dwarf shrubs, or artificial mini trees work beautifully to represent towering forest trees in your tiny world. Place taller greenery toward the back or sides of the container to frame the scene and create depth. This layering technique helps your garden look more natural and visually balanced instead of flat.
Mini trees also help anchor the design and make the fairy house look proportionate. You can decorate the trees with tiny hanging lanterns, miniature swings, or delicate fairy lights to enhance the magical theme. If using live plants, ensure they suit the lighting conditions of your space. Trees instantly give your fairy garden a woodland charm that feels immersive and enchanting. Their height variation adds dimension, making your design look professional and Pinterest-worthy from every angle.
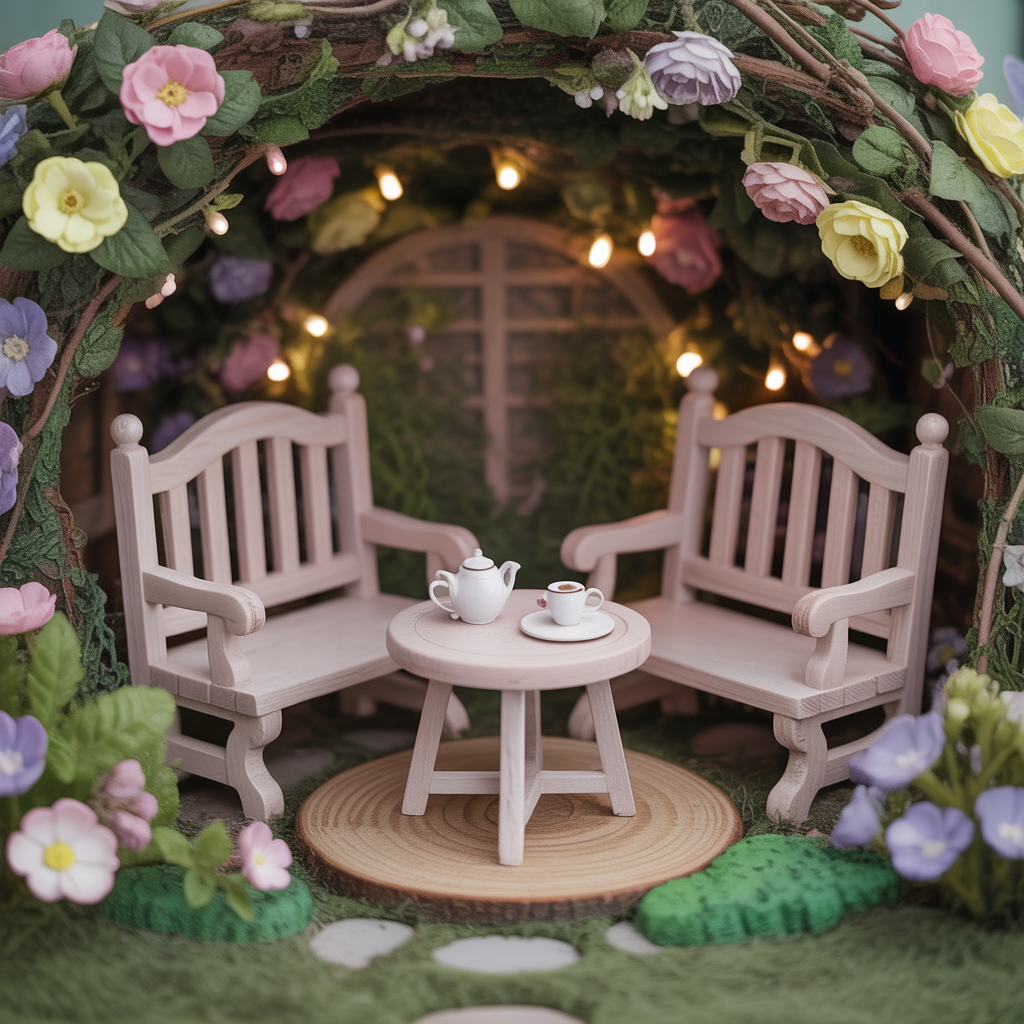
🪑 15. Create a Cozy Sitting Corner
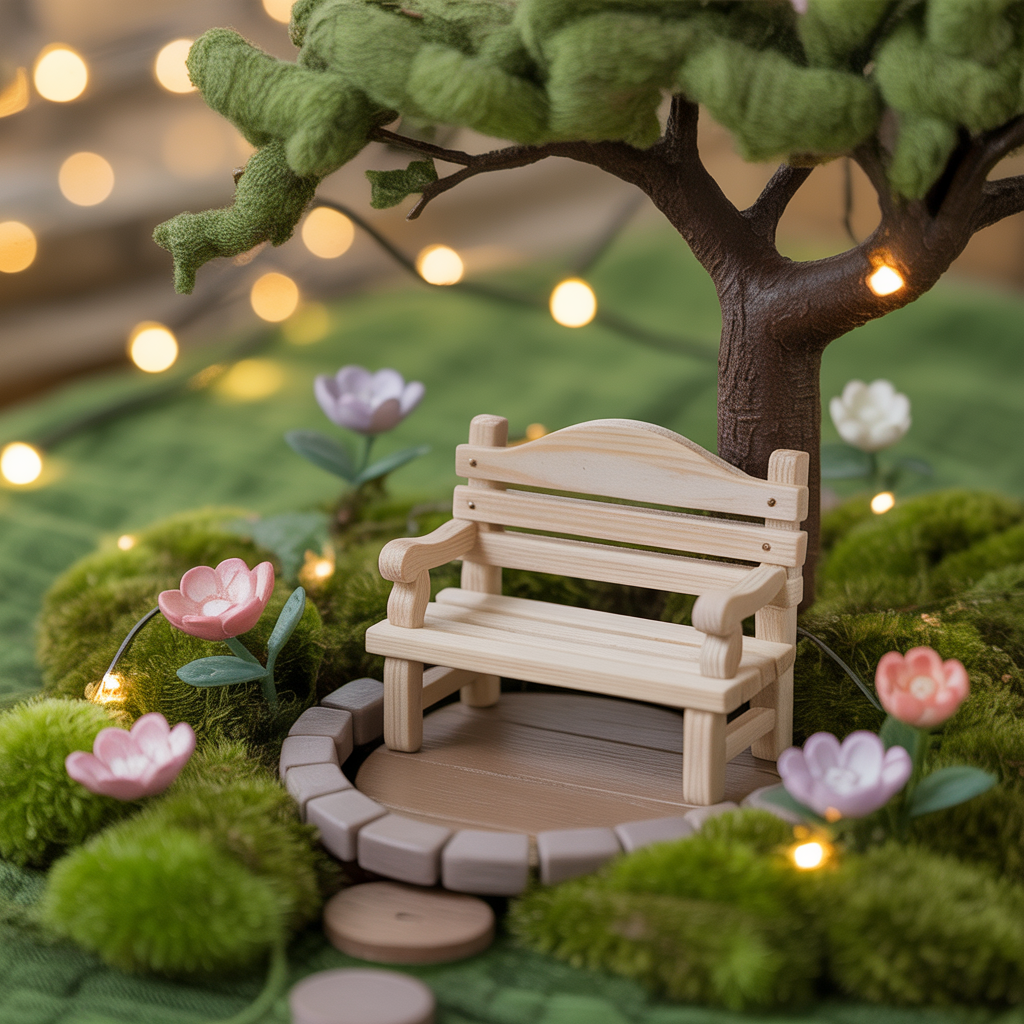
A cozy sitting corner adds storytelling magic to your fairy garden. Arrange a tiny bench, chairs, or a miniature swing under a tree or near the fairy house. This detail makes the space feel lived-in and inviting, as if fairies gather there for tea or quiet moments. You can enhance the setup by adding a small table, miniature books, or tiny flower pots to create charm and personality.
Position the seating area slightly off to one side to avoid blocking the focal point. Surround it with moss or flowers to blend it naturally into the landscape. This small feature brings warmth and imagination to your design. It encourages viewers to pause and imagine the story behind the scene. A well-styled sitting corner is visually appealing and makes your fairy garden feel cozy, peaceful, and full of character — perfect for capturing beautiful Pinterest photos.
🌈 16. Add Decorative Stones and Crystals

Decorative stones and tiny crystals add sparkle and texture to your fairy garden. Use polished pebbles, colorful gravel, or small crystal pieces to create magical accents. Scatter them along pathways, around the fairy house, or near water features for subtle shimmer. Clear quartz or pastel-colored stones work beautifully for a dreamy, enchanted vibe.
Be mindful not to overuse decorative stones. A few carefully placed accents look elegant and magical without overwhelming the space. You can also use flat stones as stepping stones along the path for added realism. These small reflective elements catch natural light and enhance the overall visual appeal. Decorative stones help elevate your fairy garden from simple to stunning, making it look thoughtfully designed and perfectly styled for social media sharing.
🏞️ 17. Build a Tiny Bridge
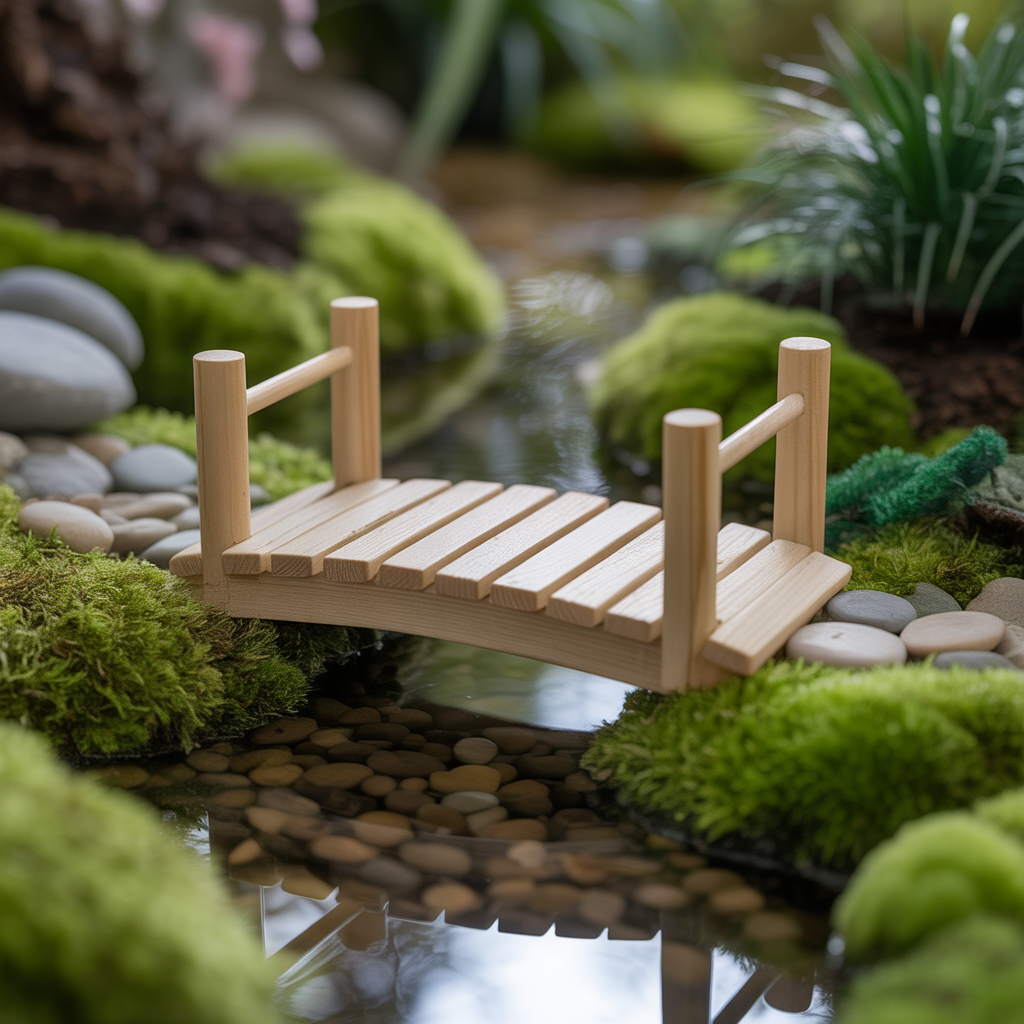
A tiny bridge adds whimsy and architectural interest to your fairy garden. Place it over a small pond, pebble stream, or even across a mossy section to create the illusion of different garden levels. Mini wooden or resin bridges are easy to find, or you can craft one from popsicle sticks for a handmade touch.
Position the bridge so it feels natural within the landscape. Surround it with plants, moss, or stones to anchor it visually. Bridges create a sense of journey and exploration, making your fairy garden feel larger and more interactive. They also serve as a stunning focal point in photos, drawing attention to the center of the design. This charming addition enhances storytelling and gives your miniature world a whimsical fairy-tale atmosphere.
🌙 18. Create a Nighttime Glow Effect
Transform your fairy garden into a magical nighttime wonderland by adding glow-in-the-dark elements. Use glow pebbles along pathways or small luminous accents around the fairy house. These subtle details create a soft magical glow once the lights go down, making your garden look enchanting in the evening.
Combine glow elements with fairy lights for a layered lighting effect. Position glow stones strategically along curves and edges to highlight the layout. This creates depth and dimension even at night. A nighttime glow effect adds uniqueness and makes your fairy garden stand out from others. It gives your miniature world a dreamy, mystical atmosphere that looks absolutely breathtaking in photos and videos, especially during dusk.
🧚 19. Add a Personal Theme

Choosing a theme makes your fairy garden feel intentional and unique. Instead of randomly placing decorations, decide on a clear concept such as woodland forest, beach paradise, enchanted cottage, or even seasonal themes like spring bloom or autumn harvest. A strong theme helps guide your color choices, accessories, and plant selection so everything feels cohesive and harmonious. For example, a woodland theme may include moss, rustic wood textures, and tiny forest animals, while a beach theme might feature sand, seashells, and a miniature lighthouse.
Once you select a theme, stick to a consistent color palette and style. This keeps your fairy garden from looking cluttered. Themed gardens photograph beautifully because they tell a clear visual story. Adding small matching details — like themed furniture or coordinated flowers — enhances the overall charm. A well-defined theme transforms your DIY project into a stunning miniature world that feels thoughtfully designed and Pinterest-perfect.
🌼 20. Layer Different Textures
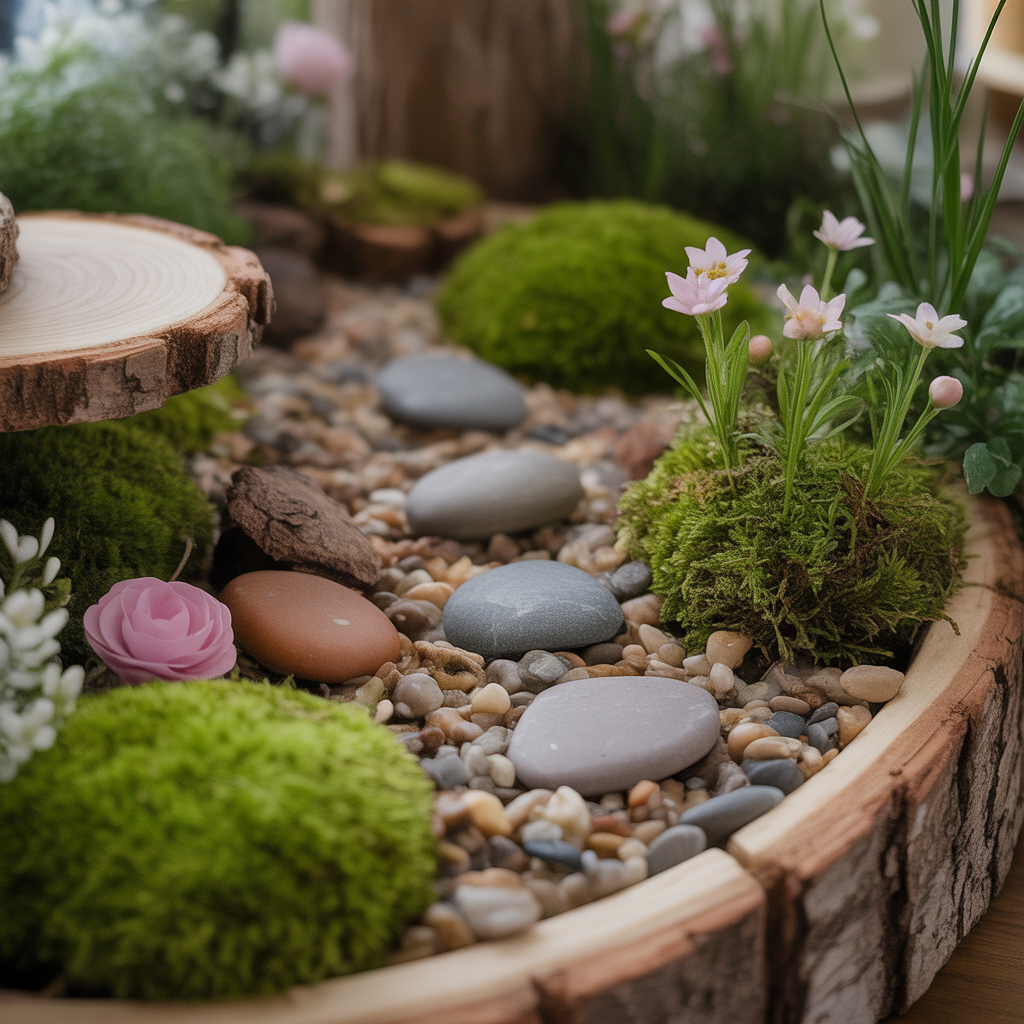
Texture is what makes your fairy garden look realistic instead of flat. Combine soft moss, rough bark, smooth pebbles, delicate flowers, and sturdy wood elements to create contrast. Layering textures adds depth and visual richness that makes your miniature landscape feel alive. When viewers look closely, they’ll notice the thoughtful combination of natural materials working together beautifully.
Start by placing larger textured elements like bark or stones, then soften edges with moss or tiny plants. This layering technique prevents harsh transitions between sections. Even small details like woven baskets or twig fences contribute to the overall texture. A mix of surfaces makes your garden more engaging in both real life and photographs. Texture adds dimension and realism, turning a simple container into an immersive fairy-tale environment.
🌸 21. Add Seasonal Decorations

Updating your fairy garden with seasonal decorations keeps it fresh and exciting all year round. For spring, add pastel flowers and tiny butterflies. In summer, incorporate bright blooms and miniature garden tools. Autumn themes can include tiny pumpkins and warm-toned leaves, while winter designs look magical with faux snow and miniature lanterns. Seasonal updates make your garden feel dynamic and creative.
Switching decorations doesn’t require rebuilding the entire garden. Simply replace small accessories while keeping the main structure intact. This approach saves time and keeps your project budget-friendly. Seasonal fairy gardens are especially popular on Pinterest because they match trending holiday searches. By refreshing small details throughout the year, your fairy garden stays relevant, charming, and visually inspiring in every season.
🌿 22. Keep It Low Maintenance
A beautiful fairy garden should also be easy to maintain. Choose hardy, slow-growing plants like succulents or moss to reduce pruning needs. Water gently and avoid overwatering, especially in containers without drainage holes. Regularly remove dead leaves and adjust decorations if they shift over time. Simple maintenance keeps your garden looking fresh and vibrant.
If your garden is indoors, place it near indirect sunlight to support plant health. Outdoor gardens may need occasional repositioning during extreme weather. Dust off decorative pieces to keep them photo-ready. A low-maintenance setup ensures your fairy garden remains magical without requiring constant work. With just a little care, your miniature world can thrive for months while continuing to look Pinterest-perfect.
🌟 23. Capture Beautiful Photos

Once your fairy garden is complete, it’s time to showcase it. Use natural lighting for the best results — morning or late afternoon light creates a soft magical glow. Take close-up shots to highlight tiny details like furniture, animals, and flowers. Try different angles to capture depth and dimension within the miniature landscape.
Use neutral backgrounds and avoid clutter around the container. Adding a subtle prop like a gardening tool or watering can can enhance the scene without distracting from the design. Editing slightly for brightness and warmth makes colors pop beautifully. High-quality photos are essential for Pinterest success. Capturing your fairy garden thoughtfully ensures your hard work shines online and inspires others to create their own magical spaces.
✨ 24. Let Your Imagination Grow
The final and most important step is to let your creativity flow. There are no strict rules in fairy gardening. You can expand your design, experiment with new themes, or even build multiple mini gardens in different containers. Over time, you’ll discover your personal style and favorite decorative elements. Each fairy garden can tell a different story.
Don’t be afraid to redesign or rearrange parts as inspiration strikes. Fairy gardens are meant to spark joy and imagination. Whether you build one for relaxation, decor, or Pinterest content, the magic lies in your creativity. With these 24 easy steps, you now have everything you need to design a dreamy DIY fairy garden that feels enchanting, cozy, and uniquely yours.
🌟 Step-by-Step Recap: How to Build Your DIY Fairy Garden
To make everything simple and easy to follow, here’s a quick step-by-step summary of the entire process:
- Choose a creative container
- Add quality potting soil
- Select miniature plants
- Plan your layout
- Place the fairy house
- Create a pebble pathway
- Add mini furniture
- Use moss for greenery
- Install fairy lights
- Add a water feature
- Place tiny fences
- Add miniature animals
- Decorate with flowers
- Include mini trees
- Design a cozy seating corner
- Add decorative stones
- Build a tiny bridge
- Create a nighttime glow
- Choose a clear theme
- Layer textures
- Update with seasonal decor
- Keep it low maintenance
- Take beautiful photos
- Let your imagination grow
This checklist makes the process feel simple, organized, and beginner-friendly — perfect for Pinterest readers who love clear guidance.
🌸 Extended Conclusion: Create Your Own Magical Mini World
Creating a DIY fairy garden is not just about decorating a container with plants and tiny accessories — it’s about designing a peaceful, imaginative escape in miniature form. In today’s busy world, small creative projects like this help reduce stress and bring joy. Every tiny pathway, glowing light, and miniature bench tells a story. When you carefully arrange plants and details, you’re building more than decor — you’re building a magical world filled with charm and personality.
One of the best things about fairy gardening is that it grows with you. You can refresh it seasonally, expand it over time, or even create themed collections. It’s budget-friendly, beginner-friendly, and endlessly customizable. Whether placed on a patio, balcony, desk, or garden corner, your fairy garden becomes a conversation piece that sparks curiosity and delight.
Most importantly, there are no strict rules. Your fairy garden reflects your imagination. You can make it whimsical, rustic, elegant, colorful, or minimal. The beauty lies in the details and the love you put into creating it. So gather your supplies, start small, and let your creativity bloom. 🌿✨
Your magical miniature world is waiting.

🌺 Conclusion
Building a DIY fairy garden is more than just a craft project — it’s a creative escape into a miniature magical world. With thoughtful planning, layered textures, charming details, and soft lighting, you can transform any simple container into a dreamy enchanted space. From selecting the perfect base to adding glowing lights and seasonal touches, each step helps create a fairy garden that feels alive and full of wonder.
Whether you’re creating it for your home decor, outdoor patio, or Pinterest inspiration, your fairy garden will reflect your imagination and style. Start small, experiment boldly, and most importantly — have fun bringing your magical vision to life 🌸✨